Manuali VOIspeed®
Yealink DECT W52P IP Telephone Configuration
The configuration of the terminals certified by VOIspeed should always be carried out with the Autoprovisioning function
Yealink T52P IP DECT Phone Configuration
The Yealink W52P IP DECT phone with default settings automatically searches for a DHCP server on the network during boot to obtain a valid IP address. For the use of the terminal with the VOIspeed Server, the Firmware version 25.73.0.40 is recommended for the Base and version 26.73.0.11 for the telephone
CONFIGURATION OF THE BASE
The configuration of the base is done via the web, by connecting with a browser to the IP address of the base which can be obtained from the same mobile phone associated with the base:
- Click the OK button
- Click on the Status icon at the top left
- Select the Base menu: the IP address is visible in the first line of the screen
ASSOCIATION OF THE DECT TERMINAL TO THE BASE
The phone included in the package is already paired with its base from the factory, but if it fails to pair, do one of the following.
- If the phone display reads “Searching for Base”, long press the front button on the base until the Registration LED starts flashing. At this point from the telephone, press the OK button then select Settings -> Registration -> Register Handset to register the telephone: if the PIN is requested, enter 0000 (4 times zero).
- If the phone display reads “Press base page 2s then press OK”, long press the front button on the base until the Registration LED starts flashing. Then press the OK softkey on the phone (located immediately below the display).
Once connected via the web, the administrator’s username and default password are both admin. Below we indicate the parameters to be modified with respect to the default configuration, referring to a generic user created on the VOIspeed PBX with the following credentials:
username: extension343
password: 3434343xyz!
internal: 343
VOIspeed server ip address: 192.168.0.220
VOIspeed server domain: mydomain.com
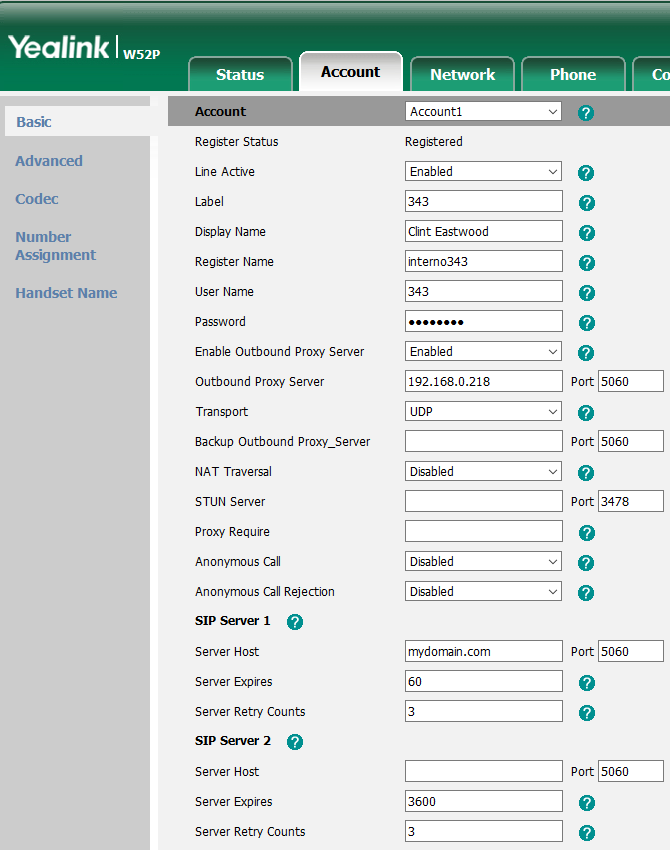
ACCOUNT -> REGISTER
We list below the parameters to be modified
| Line Active: Enbled Label: User 343 (indifferent for registration purposes) Display Name: Clint Eastwood (indifferent to recording purposes) Register Name: username of the user on the VOIspeed PBX (eg: extension343) User Name: user extension on the VOIspeed PBX (ex: 343) Password: user password on the VOIspeed PBX (eg: 3434343xyz!) Enable Outboud Proxy Server: Enabled Outbound Proxy Server: IP address of the VOIspeed PBX (ex: 192.168.0.220) Port: is the listening SIP port of the PBX. Point to: –5060 for the On Premises platform – XXXXfor the UCloud platform – 5058 for the Cloud platform NOTE: the SIP listening port in UCloud environment for SIP terminals is different for each company. Therefore the fields in question will be according to the cases, therefore it is necessary to consult in the settings of the PBX which is your port. Connect to the Configuration → Company menu and see the value of the SIP Port parameter in the Properties box. |
SIP Server
Server Host: domain of the VOIspeed PBX (e.g. mydomain.com) 11
Port: same settings as above
Server Expires: recommended value between 60 and 120 (in seconds)
1 Attention: the domain name must be entered in the xxxxxxxx.yyyy format (eg: miazienda.pbx, company.biz, società.it, etc.).
After completing the entry of the above parameters, you need to click on the Confirm button.
ACCOUNT -> CODEC
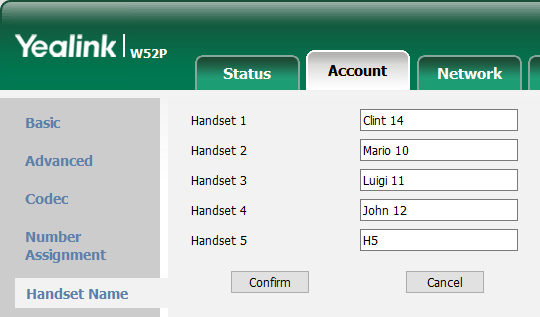
PHONE NAME
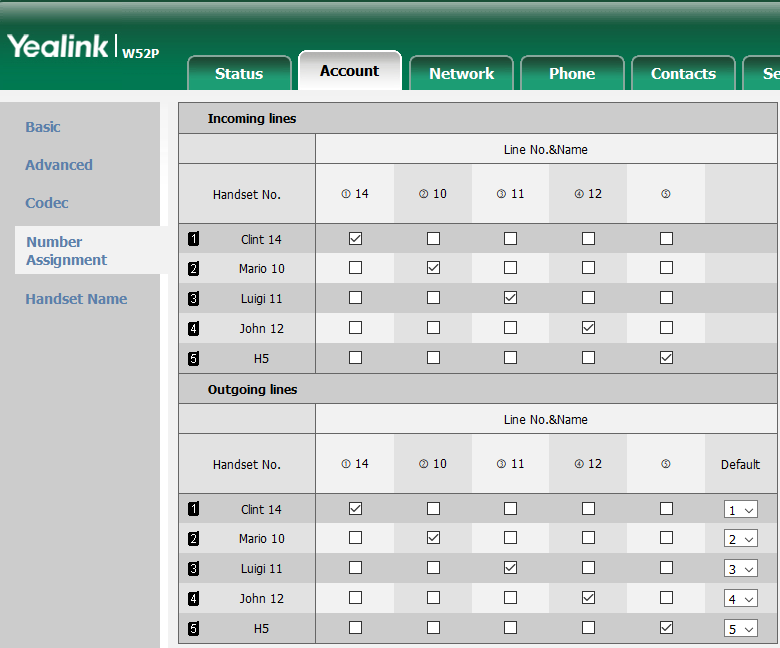
ASSIGNING NUMBERS
PHONE -> PREFERENCES
Set the following parameters for time synchronization (the base must surf the internet and use a valid DNS server):
Time syncronization: Enabled
Time Server: it.pool.ntp.org
Synchronization Period: 86400
Time Zone: +1 France, Germany, Italy …
PHONE -> TONES
Set the Select country parameter to Italy
CLICK TO DIAL
| After registering the base to the PBX, in the Toolbox – Terminals section, locate the user agent Yealink SIP-W52P 25.73.0.40, modify and disable the “click to dial supported” function. In this way, making a call with the GUI, the PBX will first call your phone, which will automatically answer with the speakerphone, then the recipient. If you do not want your phone to answer automatically, disable the Auto Answer parameter from the phone menu Settings -> Telephony User Agent | 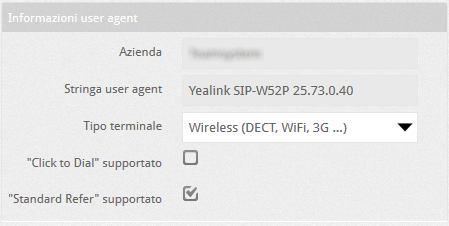 |
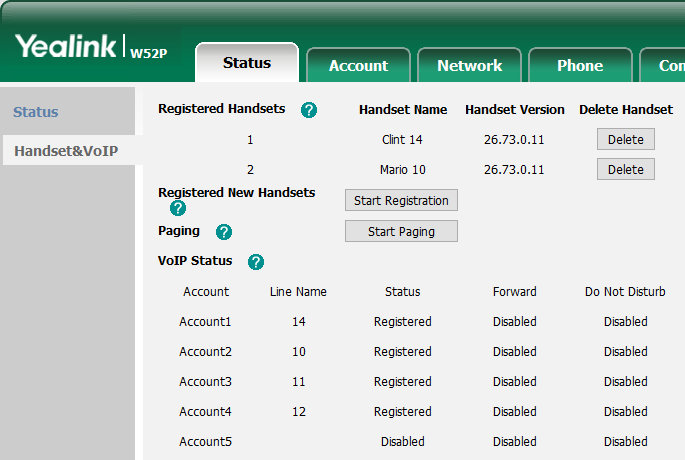
ADDITIONAL PHONE REGISTRATION
Through the Start Paging button, it is possible to make all registered telephones ring. Useful function for tracing terminals if they are lost from sight.


