Manuali VOIspeed®
IntroductionLynfa Comunicazione – User Guide
Introduction
In this article we will focus on the user experience of the “Communication” module within Polyedro and we will also investigate the functional and management part of the latter.
First of all, let’s say that the user can use all the features of the “Communication” module only if the administrator has completed the configuration and granted the appropriate permissions. Otherwise, once logged in, the user sees the “Telephone” item in the main portal panel, but this is devoid of any functionality (icon colored black), as shown in the figure, and clicking on the button is redirected to the information page of Lynfa Comunicazione, and subsequently to the TSInforma portal.

Returning to the initial case, in which everything is correctly configured and you have the necessary permissions, the telephone icon in the main keypad appears colored green and the menu for using the telephone functions is shown when the mouse is moved over.

By clicking on the items preceded by the colored icons you can quickly change your telephone status:
• green icon: present
• yellow icon: do not disturb
• gray icon: absent
While clicking on the other menu items brings up the telephone interface (UI) and opens the various sections: call interface and user status, call log, chat, voicemail.
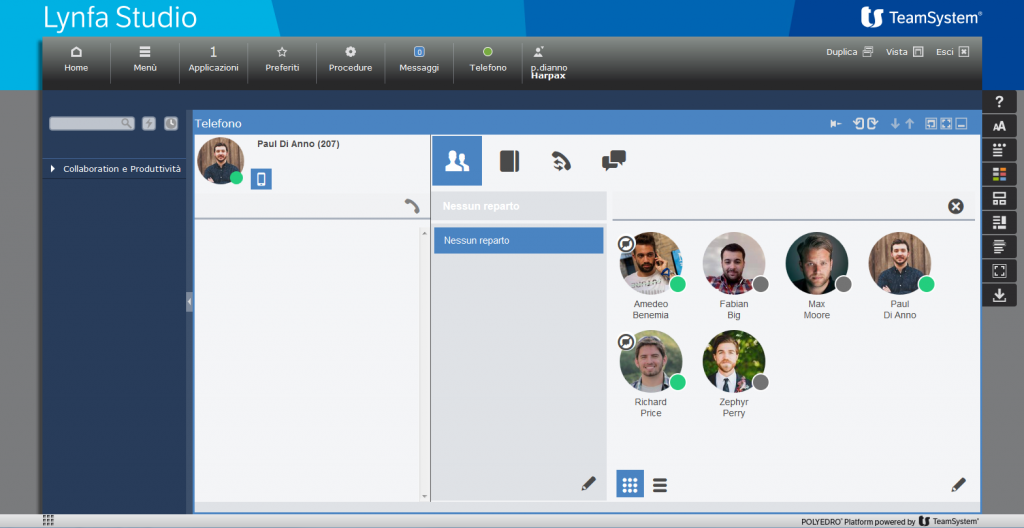
Basically it is the UI of the VOIspeed UCloud service, but redesigned and adapted to the Polyedro environment, in fact this new interface is able to interact with the surrounding environment (Polyedro Container, applications accessible from the menu). So let’s see what are the interaction mechanisms with Polyedro:
Phonebook
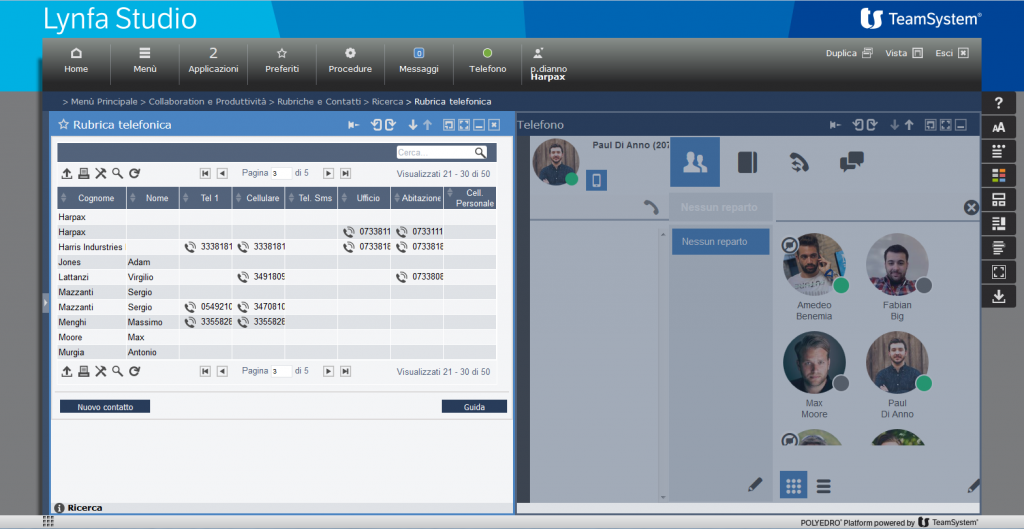
By clicking on the “Address Book” button of the UI, a WorkArea is opened containing a telephone address book developed ad hoc for the “Communication” module that combines all your personal contacts, shared contacts (managed through the Address books and Contacts application) and Single registry (general registry). Through this address book it is possible to scroll through the various names and telephone numbers, perform quick searches and call a number simply by clicking on it.
Notification area
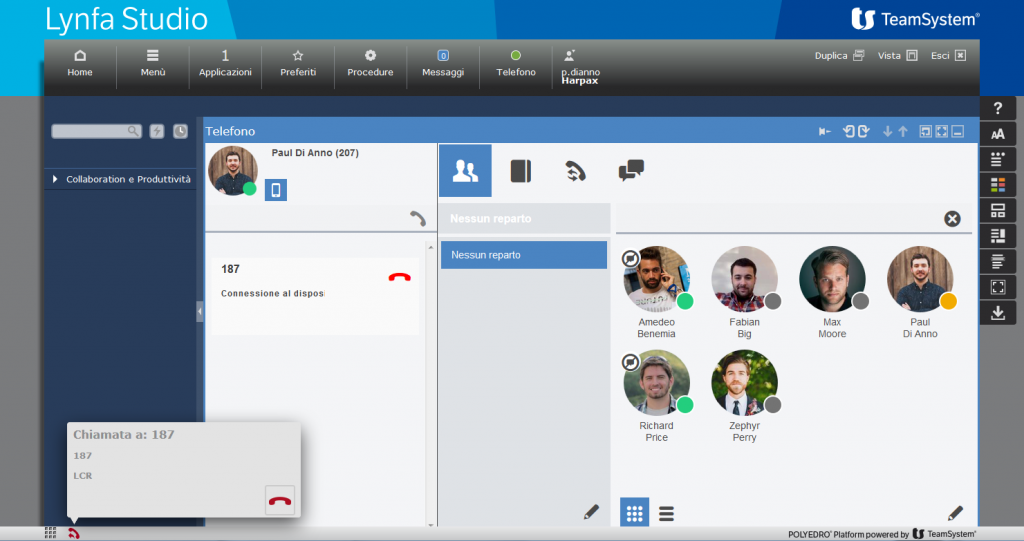
All events related to the phone call (incoming call, outgoing call, missed call, etc.), chats, voicemail, etc. are notified in a special area on the Polyedro footer, so as to have notifications even when the UI is not in the foreground and the user is working with other applications in different WorkArea, such as: Lynfa, Alyante, etc. Furthermore, these notification areas are also interactive, since they have icons, by clicking which you can perform quick operations, such as closing a call, responding to a chat and so on.
Click-to-call
In all Polyedro applications (General Registry, Directories and Contacts, Lynfa, Alyante, etc.), where a telephone number is displayed, there is also the “Phone Number” widget that allows you to start the call on the fly, simply by clicking on the number or on the icon alongside.
Call info screen
When you make calls, receive calls or call transfers – if the number in question belongs to a personal data – an information screen is opened in which both the alerts associated with the personal data entered manually by users and information from the management systems are displayed. The ability to open this screen or not is governed by user preferences, which will be explained in the next paragraph.
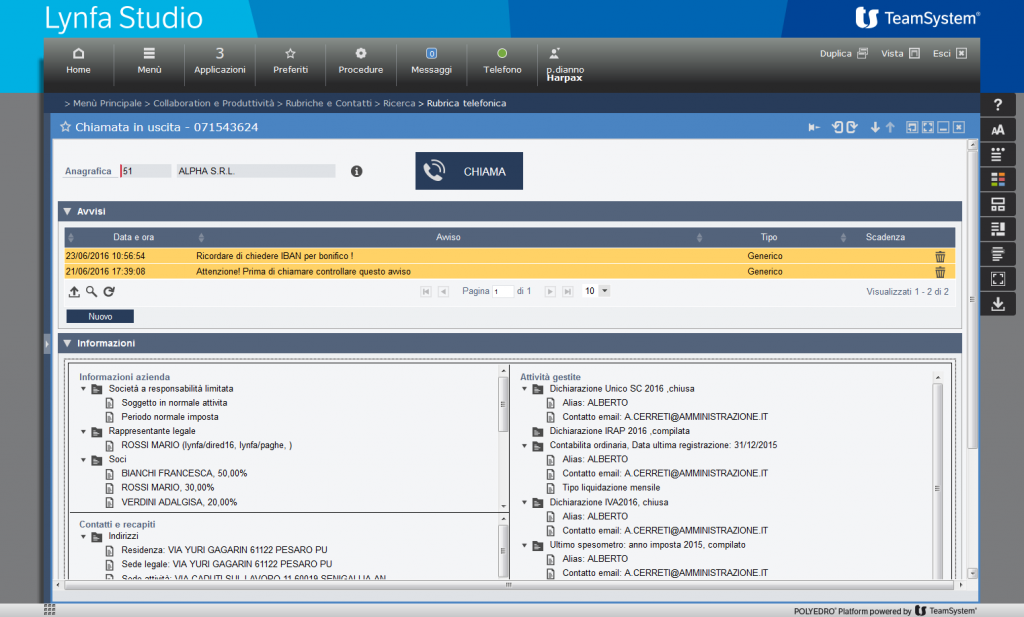
Note: the information screen opens only in the case of calls to and from the outside and not for those involving internal numbers (other Polyedro / Lynfa Comunicazione stations).
User preferences
The preferences page allows you to set the parameters that regulate both the integration with the information and alerts window during the call, and the options relating to the call itself.
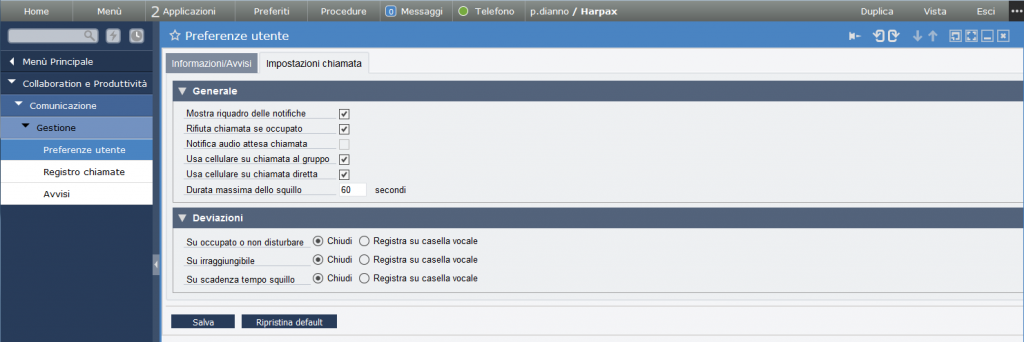
The preferences concerning the call allow you to decide how to best manage all incoming and outgoing call situations based on the specific needs of the user. They typically concern the VOIspeed world, therefore for an in-depth study on this topic we invite you to consult the VOIspeed UCloud guide.
Instead, in the first tab “Information / Notices” you can decide which telephone events to trigger the opening of the screen in which the user can view any warnings or information from the management systems associated with the registry.

Obviously, this functionality is only implemented when the VOIspeed UCloud service finds a correspondence between the telephone number and a personal data element (Single Registry). With regard to outgoing calls, you can decide on a further behavior of the application, i.e. if you want the call to always be made and the information screen to be opened at the same time, or if you want to view the information screen first, leaving the call on standby, and only later, after reading the information, do you want to confirm the outgoing call. Also in this case the passage to the information screen takes place where there is a correspondence between the telephone number and the personal data. The default values of the preferences are those inherited from the settings of the administrative area of the “Communication” module. It is possible to reset these values by simply clicking on the “Restore default” button.
Call log
The “Call log” item in the Management menu allows you to view the complete report of all the calls of the login user. It is also possible to filter calls based on type (incoming, outgoing, lost, etc.), telephone number, or set the desired time interval. There is also an export tool (in text / csv format) of the call list. The displayed page is downloaded directly from the UCloud service and encapsulated in a Polyedro WorkArea. It is therefore not a Polyedro application but a VOIspeed interface, which still offers the same look & feel of Polyedro.

For a detailed guide of the call report, refer to the VOIspeed UCloud manual [Link to the voispeed manual> Reporting> Calls].
Notices
The “Communication” module also provides a complete management section of the notices that can be associated with a personal data and subsequently viewed during the call phase. On the Alerts page there is a list of all alerts that the user can manage, based on the permissions assigned to them by the administrator. In the header there is the selection of the work company and the registry with which to filter the alerts. In addition to the filter on the personal data, the fields with all the information already present for that personal data will be filled in in the Contact details section. There is an additional “Filters” section through which you can select various parameters to limit the search field for alerts.
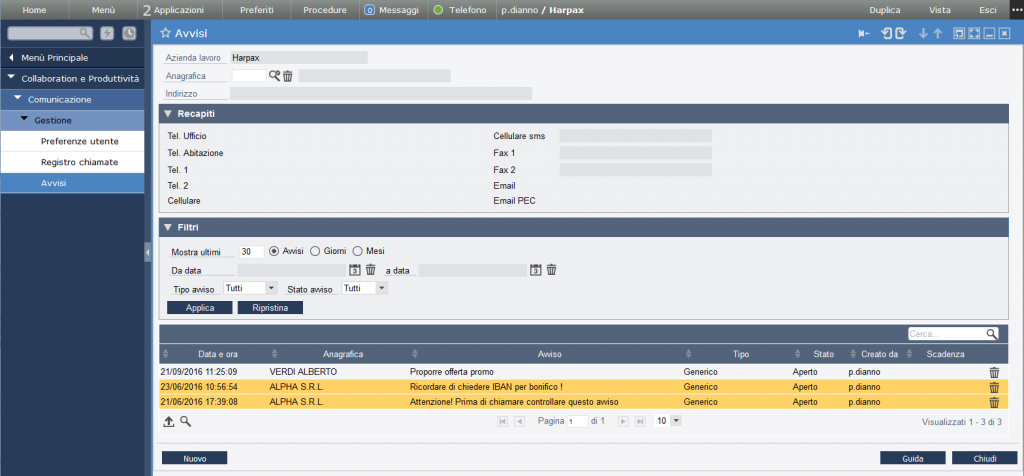
It is also possible to insert new notices associated with a specific personal data. Then, during the insertion phase, the first thing to do is to select the registry to which you want to associate the notice, then specify the other fields that make up the notice and possibly upload an attachment. The “Subject” field represents the summary title and is the text that should give the user an idea of the content of the notice during the call. The other fields are pre-filled, and unless we have specific needs (such as setting a time window of validity, outside of which the notice will not be shown), they can be left unchanged. Among these there is also the “Type” field, through which the user can decide to mark the notice with a certain type, choosing from those previously configured by an administrator.
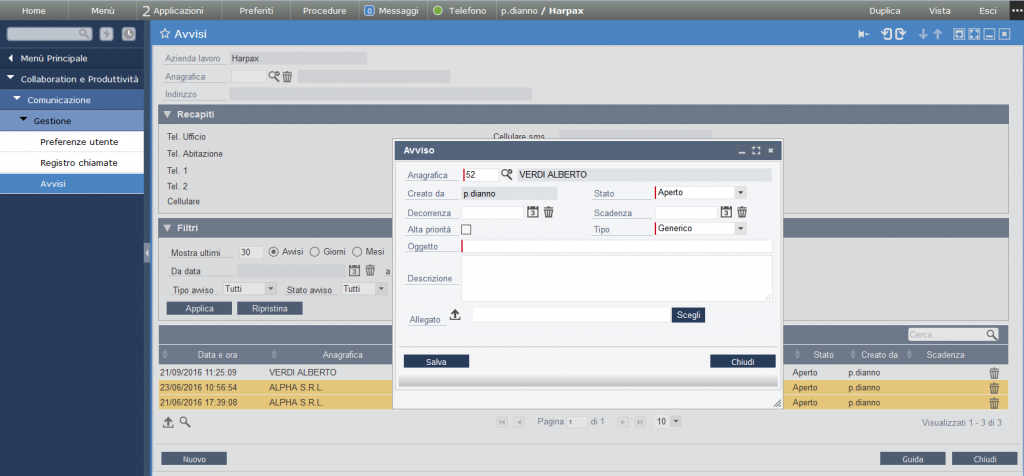
For more detailed information on using the Notices page, please also consult the Polyedro manual for this page.
Procedure info
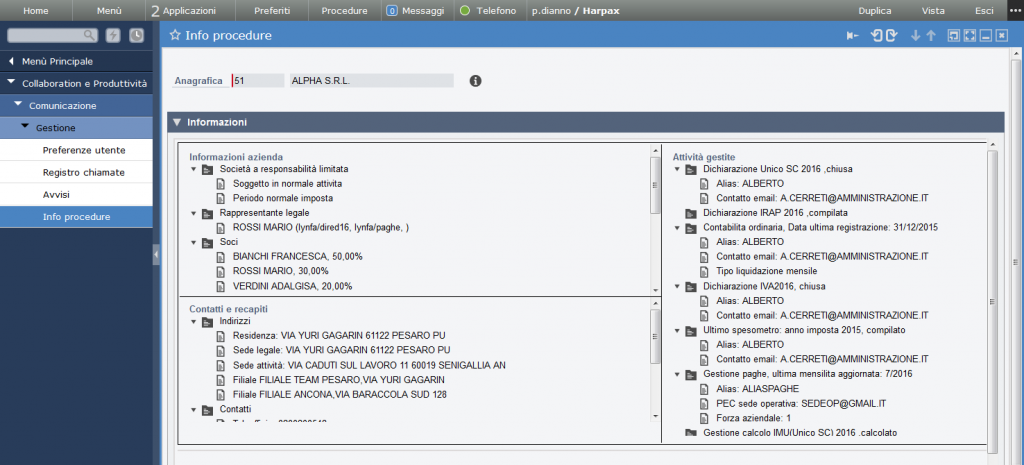
This page allows you to consult the information associated with a certain personal data coming from the management procedures. After selecting the registry via the lookup, just click on the “lens” icon and all the information will be shown in the dedicated boxes. This function is to all effects a simulation of what would happen during the call phase, when you have chosen to open the information screen and select the management procedures from which to obtain the information.
